
© Copyright 1993-2002 The L. W. Ramsey Adverting Agency 1-800-473-0157 |
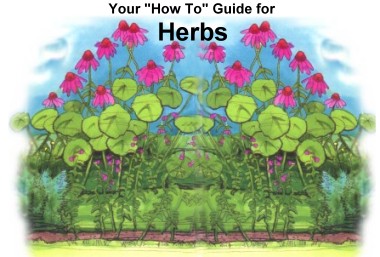
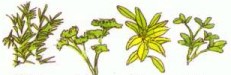
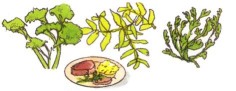
 Herbs are among the easiest of plants to grow and enjoy. A herb garden, even in a single pot on a patio or window sill can yield more fun and make a bigger difference in your cooking or your life, plant for plant, than any other kind. Herbs provide flowers, fragrance, flavor, more comfort, and better health. Aloe offers first aid for burns, lavender and tansy keep moths out of clothes, and shoofly keeps flies out of the kitchen. Any plant with possible uses– culinary, aromatic, therapeutic, medicinal, cosmetic, for natural dyes– beyond the usual one for landscaping or producing food is a herb and you can pronounce it with or without the H. Herbs are among the easiest of plants to grow and enjoy. A herb garden, even in a single pot on a patio or window sill can yield more fun and make a bigger difference in your cooking or your life, plant for plant, than any other kind. Herbs provide flowers, fragrance, flavor, more comfort, and better health. Aloe offers first aid for burns, lavender and tansy keep moths out of clothes, and shoofly keeps flies out of the kitchen. Any plant with possible uses– culinary, aromatic, therapeutic, medicinal, cosmetic, for natural dyes– beyond the usual one for landscaping or producing food is a herb and you can pronounce it with or without the H. 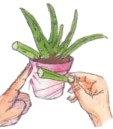
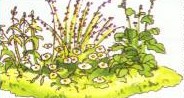
Which Herbs To Choose You need to know whether they need sun or partial shade, constant moisture or dry spells between watering. Knowing how tall they will get lets you put them in the front or back of the border or box. Most herbs stay much smaller in containers. You need to know whether they are annual like nasturtiums and will need planting every year, perennials like lemon balm and mint that will come up every year, or biennials like parsley that will bloom the second year and then die out. Some annual herbs like dill and borage will self seed as long as there is sufficient moisture. Choose plants that are hardy in your climate. If you live in the Sunbelt, you can grow ginger and citrus. Some otherwise delightful herbs like mint can take over your garden, but not if planted in a container or if you surround the plot with mown grass or cement walks. This booklet and the label or advice you get with your plant will start you off just fine and you can learn as you go. Books from the library or bookstore, advice or bulletins from the county Cooperative Extension Service, or advice from the people where you buy the plants can fill in the details as you need them. Selecting the Site Top of Page Nothing beats the convenience and pleasure of having the cooking herbs by the kitchen door or on the kitchen window sill in winter. Start with half a dozen of the most useful culinary herbs: parsley, sage, rosemary, thyme, plus mint and chives. (Also- see chart) Herbs can grow in mixed flower borders or among shrubs. Plant the ones with fragrant foliage where you can brush against them or pluck a leaf to crush when passing or sitting nearby. Herbs that chase mosquitoes and flies, like basil, shoofly (Nicandra) plant, and certain scented geraniums, are best by the kitchen door or on the patio. The ones that you raise for wreaths or potpourri can go in rows in the vegetable garden.
Preparing the Soil Top of Page Starting with SeedTop of Page
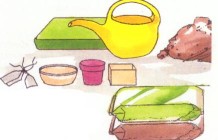
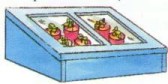
Use margarine dishes, 4 inch pots, or milk cartons cut to size. If there are no drainage holes, make some with the point of a paring knife or an ice pick warmed over a flame. With pen or pencil that will not fade in rain and weather (nurseries sell these) or an indelible laundry marker, write the name of the plant on the label. Add the date or the color or height of the plant if there is room. Fill the container to within half an inch of the top with soil or medium that is fairly moist but not soggy.
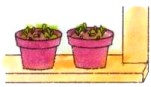
Then add the label and place each container or Care of Seedlings Top of Page
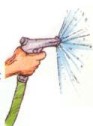
When plants in flats or crowded containers show four to six leaves, transplant them directly outdoors if it is warm enough or to individual pots if not, or give them more room in mixed containers. Fill pots with damp, fertile soil. Then use a pencil to lift plants up carefully. Hold them by the leaves, not the fragile stems, as you firm the soil gently around the roots. Planting Seed Outdoors Top of Page Leave walkways or place stepping stones so you can easily get to all parts of the bed. Plant your seeds according to packet directions. Unless it is rainy, water seeded areas at least twice a day with a fine spray to keep the soil evenly moist at all times. The top, where most seeds are germinating, can dry out quickly on a hot or windy day. A hard rain, on the other hand, may wash out smaller seeds. If it does, replant as soon as possible. Two weeks after the seedlings emerge, broadcast some safe, slow-release, non-burning fertilizer. Transplanting HerbsTop of Page
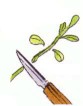
•If it is very cold, or windy, shade and protect the plant, with a Hot-Kap, overturned canning jar, bottomless milk jug, or floating row cover that will let in some air and light. Remove this for longer parts of each day for about a week. Summer transplants also benefit from covers for shade and added humidity. • Whenever possible, transplant late in the day or on a cloudy day to give the plants the longest possible time to readjust. • Cut back the foliage to reduce transpiration and stress on the roots. For herbs, use, freeze, or dry the leaves and sprigs you cut off. Immediate harvest from a new plant reduces the shock of transplanting and increases the appreciation of the planter. • New plants, even ones that will be drought resistant later, need constant moisture when first transplanted. Make a donut like depression around the plant and then water well and slowly. Making More Plants with CuttingsTop of Page For cuttings fill a clean container with a sterile medium like vermiculite, perlite, or sand that is wet but not soggy. Cut off 4 to 8 inches of tip growth, cutting just above a node or leaf joint so unsightly stubs on the parent will not attract insects and diseases. Make a new slanting cut just below a node and remove the lower leaves of the cuttings.
With herbs you can use these otherwise discarded pieces in cooking or potpourris. If you have powdered rooting hormone, dip the stem ends in water and then in the hormone. Then make a hole in the medium and insert the cuttings to cover at least one node. Firm the medium around the stem. Cuttings can go fairly close in the container with the leaf tips just touching. Keep cuttings out of direct light and keep humidity high. After about two weeks, pull one to test. If it pulls out too easily roots are not mature enough; reset the cutting and wait a few more days. To remove rooted cuttings from the medium insert a trowel or spoon gently and lift the roots intact. Plant at once. Still Deciding which Herbs to Plant? Top of Page Consider This:
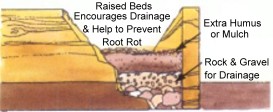
Dividing Clumps of HerbsTop of Page New plants can sometimes be cut from the side of a clump with a spade or trowel without disturbing the main plant at all. Tips for Super GrowingTop of Page • Though not necessary, many growers favor raised beds for better drainage, easier maintenance, longer lasting soil improvement, and neater appearance. • Put several kinds of herbs together rather than all one kind. The mixture will give better pest control. • Mulch around herbs to keep the ground a more even temperature and prevent alternate freezing and thawing in spring that can thrust roots out of the ground. Mulch soaks up water and holds it around the plant, thus preventing both runoff and erosion. If the layer is thick enough to keep light from the weed seeds, weeds will not germinate. The few that do will pull up easily because the soil will be soft and workable. • Do not overfeed herbs. Use any all-purpose fertilizer and read the label carefully. Then start with half of the recommended strength and see if that is sufficient. Also be sure the plants have all the other things they need: sun,water, humidity and reasonable temperatures. Overfeeding will decrease the concentration of essential oils and therefore the fragrance and flavor. Too much nitrogen can cause rapid, lush growth of foliage but hardly any flowers or seeds. Remove weeds when they are tiny, before they go to seed. Pruning HerbsTop of Page Let such long and lovely bloomers as lavender grow freely throughout the summer and then cut them well back at harvest in early autumn. Germander will usually manage to bloom in spite of frequent clipping. If flowers are not important, make a spring and a mid- to late-summer clipping. Discard the rare plant with serious problems to the bottom of a HOT compost pile or to a trash bag. Root rot sometimes occurs, especially in a very humid climate like the Florida gulf coast in the summer or in a wet and muggy season elsewhere. The gray-leaved herbs and the low, sprawling thymes and marjoram are most susceptible. Raised beds, improved drainage, extra
humus and a gravel or rock mulch will all help prevent the problem. Once detected, it is usually too late for control and sulfur and Bordeaux mix are the only fungicides recommended.
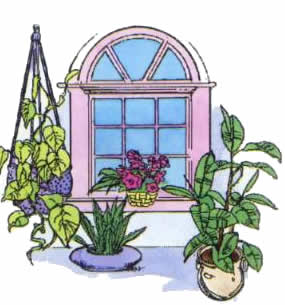
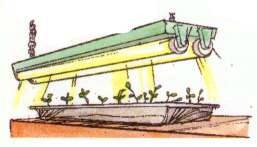
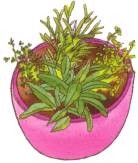
Winterizing Your Herb GardenTop of Page . Or take cuttings and start new plants (go to “Making More Plants with Cuttings”.) Bring in the ones you most want to have all winter or just want to save. Plant several different herbs together in an old kettle or crock, or put them in a windowbox on your kitchen window sill or in hanging baskets. With five to six hours of sunlight daily in south or west-facing windows, they will do almost as well as outdoors and be much more convenient. With fluorescent lights, plants can brighten the darkest corner or produce a cash crop in the basement. Indoor CareTop of Page Herbs that grow indoors all year benefit from regular, light feedings of one of the balanced houseplant fertilizers applied in liquid solution. Feed them as often as every two weeks from late spring to early fall if they are growing vigorously. Most dry fertilizers are too strong, but potted herbs as well as outdoor ones can use one application of a slow-release fertilizer in the spring and another in summer. Work the little beads into the top half inch of soil and they will do their job for a good three or four months. Using Herbs FreshTop of Page Slip out in the midst of supper preparations to gather a mixed handful of nasturtium flowers and leaves, parsley, arugula, cress, or purslane for the salad. Pick mint or lemon balm for the sun tea in the morning when you set it out for best infusion or just before serving for garnish. When you gather the vegetables for supper or canning, gather the herbs to put with them.
Fresh herbs give the best flavor and texture and take the least work. Cut stems and heads of seeds when they are almost mature but before any capsules begin to open. Put these upside down in a paper bag with the kind and date written on it. Close the top to keep out insects. When these are completely dry, much of the seed will fall out on its own. A good pounding will release the rest. Remove any large pieces of stem by hand. Harvesting for StorageTop of Page Gather leaves and flowers in the morning just after the dew has dried and before the sun dissipates the essential oils. Use a pruning snips, shears, or scissors or simply pinch brittle stems. If you want the whole plant, you can cut back annuals to 3 inches above FreezingTop of Page
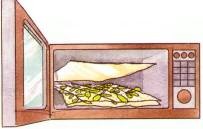
DryingTop of Page Use a gas or electric oven on its lowest setting with the door open a few inches. Turn the leaves frequently. Unfortunately, they often dry too fast by this method. To dry in a microwave, spread four or five stems of herbs on a double thickness of paper towels and cover with a single layer of toweling. Microwave at full power until the leaves are brittle: about two minutes for small leaves; three for larger ones. Turn halfway through. Add 30
seconds more if needed. When the leaves are brittle and fragile, but not so dry that they turn to powder when touched, they are ready for storage.
Check the stored herbs for the first few days and if any condensation forms on the glass, remove them and dry them further. Air drying works best for large quantities of herbs. Leaves should dry in about four days at optimum temperatures, up to two weeks if it is cooler. Then store as directed above.
Some facts may vary by region. Please check with your local lawn and garden dealer if concerned about possible variations. |

 Level it off and press it down gently. Then sprinkle the seeds evenly over the surface. Small seeds like parsley need only be pressed in, not covered. Larger seeds should be barely covered. Plant one kind to small pots or several kinds in rows in the same flat.
 Water each container well. The best way is to let it soak in a pan of water until the top is moist. If watering from the top, use only the gentlest spray that will not dislodge the seeds or wash too much soil over some and expose others.
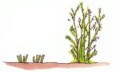
 Cold Frame


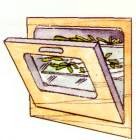
 Remove stems and pack whole leaves loosely in dark, airtight glass bottles. (Save bottles from prune juice.) Plastic or metal containers may change the chemistry. Paper or cardboard will absorb the oils. Label each container with the name and date and plan to use dried herbs within a year. After that, put any aromatic ones left over into potpourris or feed them bit by bit onto an open fire or grill.
 Air Drying